Mold Resources
With high moisture levels, warm temperatures, and plenty of nutrients, it’s no wonder mold loves to take root in our bathrooms, especially in the shower. Soap scum, skin cells, mineral buildup, and water (of course!) create the perfect location for microbial growth. Knowing how to remove mold from shower caulking can keep your bathroom safe and supporting your wellness.
Why Does Mold Grow on Shower Caulking?
Fresh caulking works great as a barrier, sealing off all those little nooks and crannies in your bathroom. But over time, as the caulking ages and degrades, it becomes more porous. Cracks allow for moisture to become trapped for prolonged periods of time. Mold can grow within 24-48 hours, providing a source of moisture and organic material, so cracking provides the perfect opportunity if a spore lands on this surface.
So, how do we prevent mold from taking over, and what can we do if it’s already there?
How to Prevent Mold on Shower Caulking
The best way to tackle mold is to prevent it from growing in the first place. In a shower, you can’t really get rid of water, so your focus should be on eliminating the mold's food source. Regular cleaning with a botanical disinfectant and microfiber towel can help keep bacteria and organic material off the caulking, which otherwise would serve as a tasty meal for mold.
Other steps to prevent mold on shower caulking include:
- Clean the liner, curtain, rod, and rings once a month if applicable
- Separate the liner and curtain if applicable
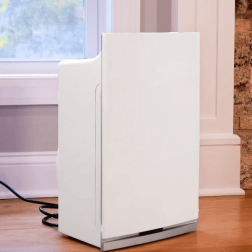
- Maintain the indoor humidity between 35-50 percent by cracking a door or window and turning on the exhaust fan while showering. If the humidity doesn’t lower to the right level, consider investing in a dehumidifier for the room
- Squeegee the shower after use
- Deep clean the bathroom regularly
- Resolve structural issues like misaligned tiles and aging grout as soon as they’re spotted because they can trap moisture and particles, allowing microbial growth
- Regularly check for structural issues such as misaligned tiles and aging grout
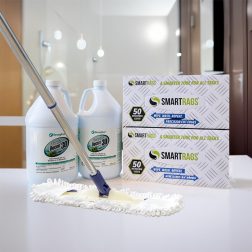
- Wash porous materials like bath mats, towels, and liners with a botanical laundry additive like EC3
- Hanging up the shower mat, towels, washcloths, and anything else damp after use
- Clean the shower head once a month
- Clean the shower weekly
How to Remove Mold From Shower Caulking
But what if mold has already made itself at home? No worries! As long as you know how to remove mold from shower caulking correctly, you’ll be able to return your bathroom to a safe space.
First, let’s clear up a common misconception first, though:. You might hear the term “mildew” used to describe some shower growths. While mildew sounds less threatening than mold, it’s really just another name for mold growth that’s light in color and powdery in texture and should be treated the same way.
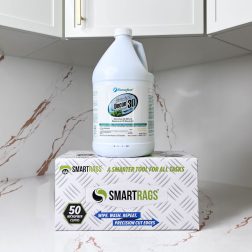
To clean moldy caulk, start by spraying the affected area with an 8% hydrogen peroxide mixture and let it sit for about 10 minutes. After that, wipe it off with a microfiber cloth. Repeat this process three times to ensure all mold is removed. Finish this up with a final round of a botanical cleaner, like Benefect Decon 30. Remember, wiping is crucial—some people suggest just spraying bleach and leaving it, but that won’t remove the mold spores, roots, or other byproducts. And besides, bleach is a harsh chemical that can be harmful, especially for those with sensitivities.
You Know How to Remove Mold From Shower Caulking, But It Came Back…
If mold keeps coming back even after cleaning, it’s time to recaulk your shower. Improperly applied caulk can leave tiny gaps where mold can sneak in and even get behind tiles, causing bigger problems down the line. Recaulking with a fresh, even application will help form a solid seal. For extra protection, consider using an antimicrobial silicone caulk, which offers additional defense against mold growth.
If it still comes back quickly, call a professional inspector. There could be some source of moisture behind the wall or some other issue that’s allowing for the microbial growth to develop. The sooner this is identified, the sooner it can be taken care of so that you’re not facing harmful exposure.
Showing all 5 results
-
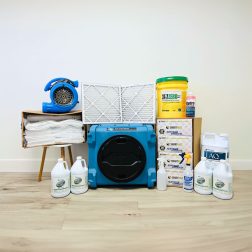
HomeCleanse DIY
All the equipment and materials we use to remediate your home, plus consultation and support...
-
$5,995.00 – $9,995.00 SHOP NOW -
Mold & Bacteria Contents Cleaning
Remove harmful pollutants that accumulate in the dust of your home. (Options available for renters...
-
$99.00 – $349.00 SHOP NOW -
HomeCleanse Cleaning
Take your cleaning to the next level buying all the tools we use to keep...
-
$299.00 – $549.00 SHOP NOW -
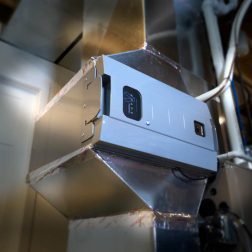
Intellipure SuperV Whole House Air Purifier
Turn your HVAC into a filtration system, removing 99% of ultrafine particles including airborne mold,...
-
$2,000.00 – $2,995.00 SHOP NOW -
Sale
Intellipure Compact Air Purifier
Buy one Compact, get one free. Simply add one to your cart, and a second...
-
Original price was: $299.00.$199.00Current price is: $199.00. SHOP NOW
Still Have Questions?
A member of our team is here to help! Click on “Get Started ➤” below to book a consultation with a member of the HOMECLEANSE team. We have a few quick questions that will help us put together a roadmap to solve or prevent all of your mold problems.
Two minutes of your time could lead to better health for you and your family.